Welcome to Documentation for Sarna - Creative WordPress Block Theme
Hello, you are looking at the documentation for Sarna - Creative WordPress Block Theme. Here you will learn how to set up the theme and customize it to fit your needs. Sarna is a modern Full Site Editing theme with several of useful custom Gutenberg block plugins.
This guide is designed for beginner users, but if you encounter something that's not covered in the documentation or is unclear, please visit the theme support tab on templatemonster.com and ask your question.
You can visit the demo site at https://sarna.realthe.me/
Getting Started
After downloading the purchased ZIP archive from TemplateMonster.net and unzipping it, you will find the following files:
- sarna.zip - main theme
- documentation.url - shortcut link to online documentation
- plugins - folder with 8 plugins
- assets - folder containing images and logos related to the theme.
Installation
Steps to install the theme:
- Login on your WordPress Admin Panel.
- Select Appearance > Themes menu item.
- Click Add New Theme button.
- Click the Upload button, then click Choose File.
- In the dialog box that opens, select the previously downloaded sarna.zip archive and upload it. Once the upload is complete, click the Install Now button to install.
- Now you can activate the theme you just installed by clicking Activate button.
For more info check https://wordpress.org/documentation/article/work-with-themes/
Required Plugins
Plugin Installation Process:
-
After installing and activating the theme, you will see a notification box prompting you to install the required and recommended plugins. Proceed with the installation of the necessary plugins by clicking the "Begin installing plugins" link (see Pic. 1).
-
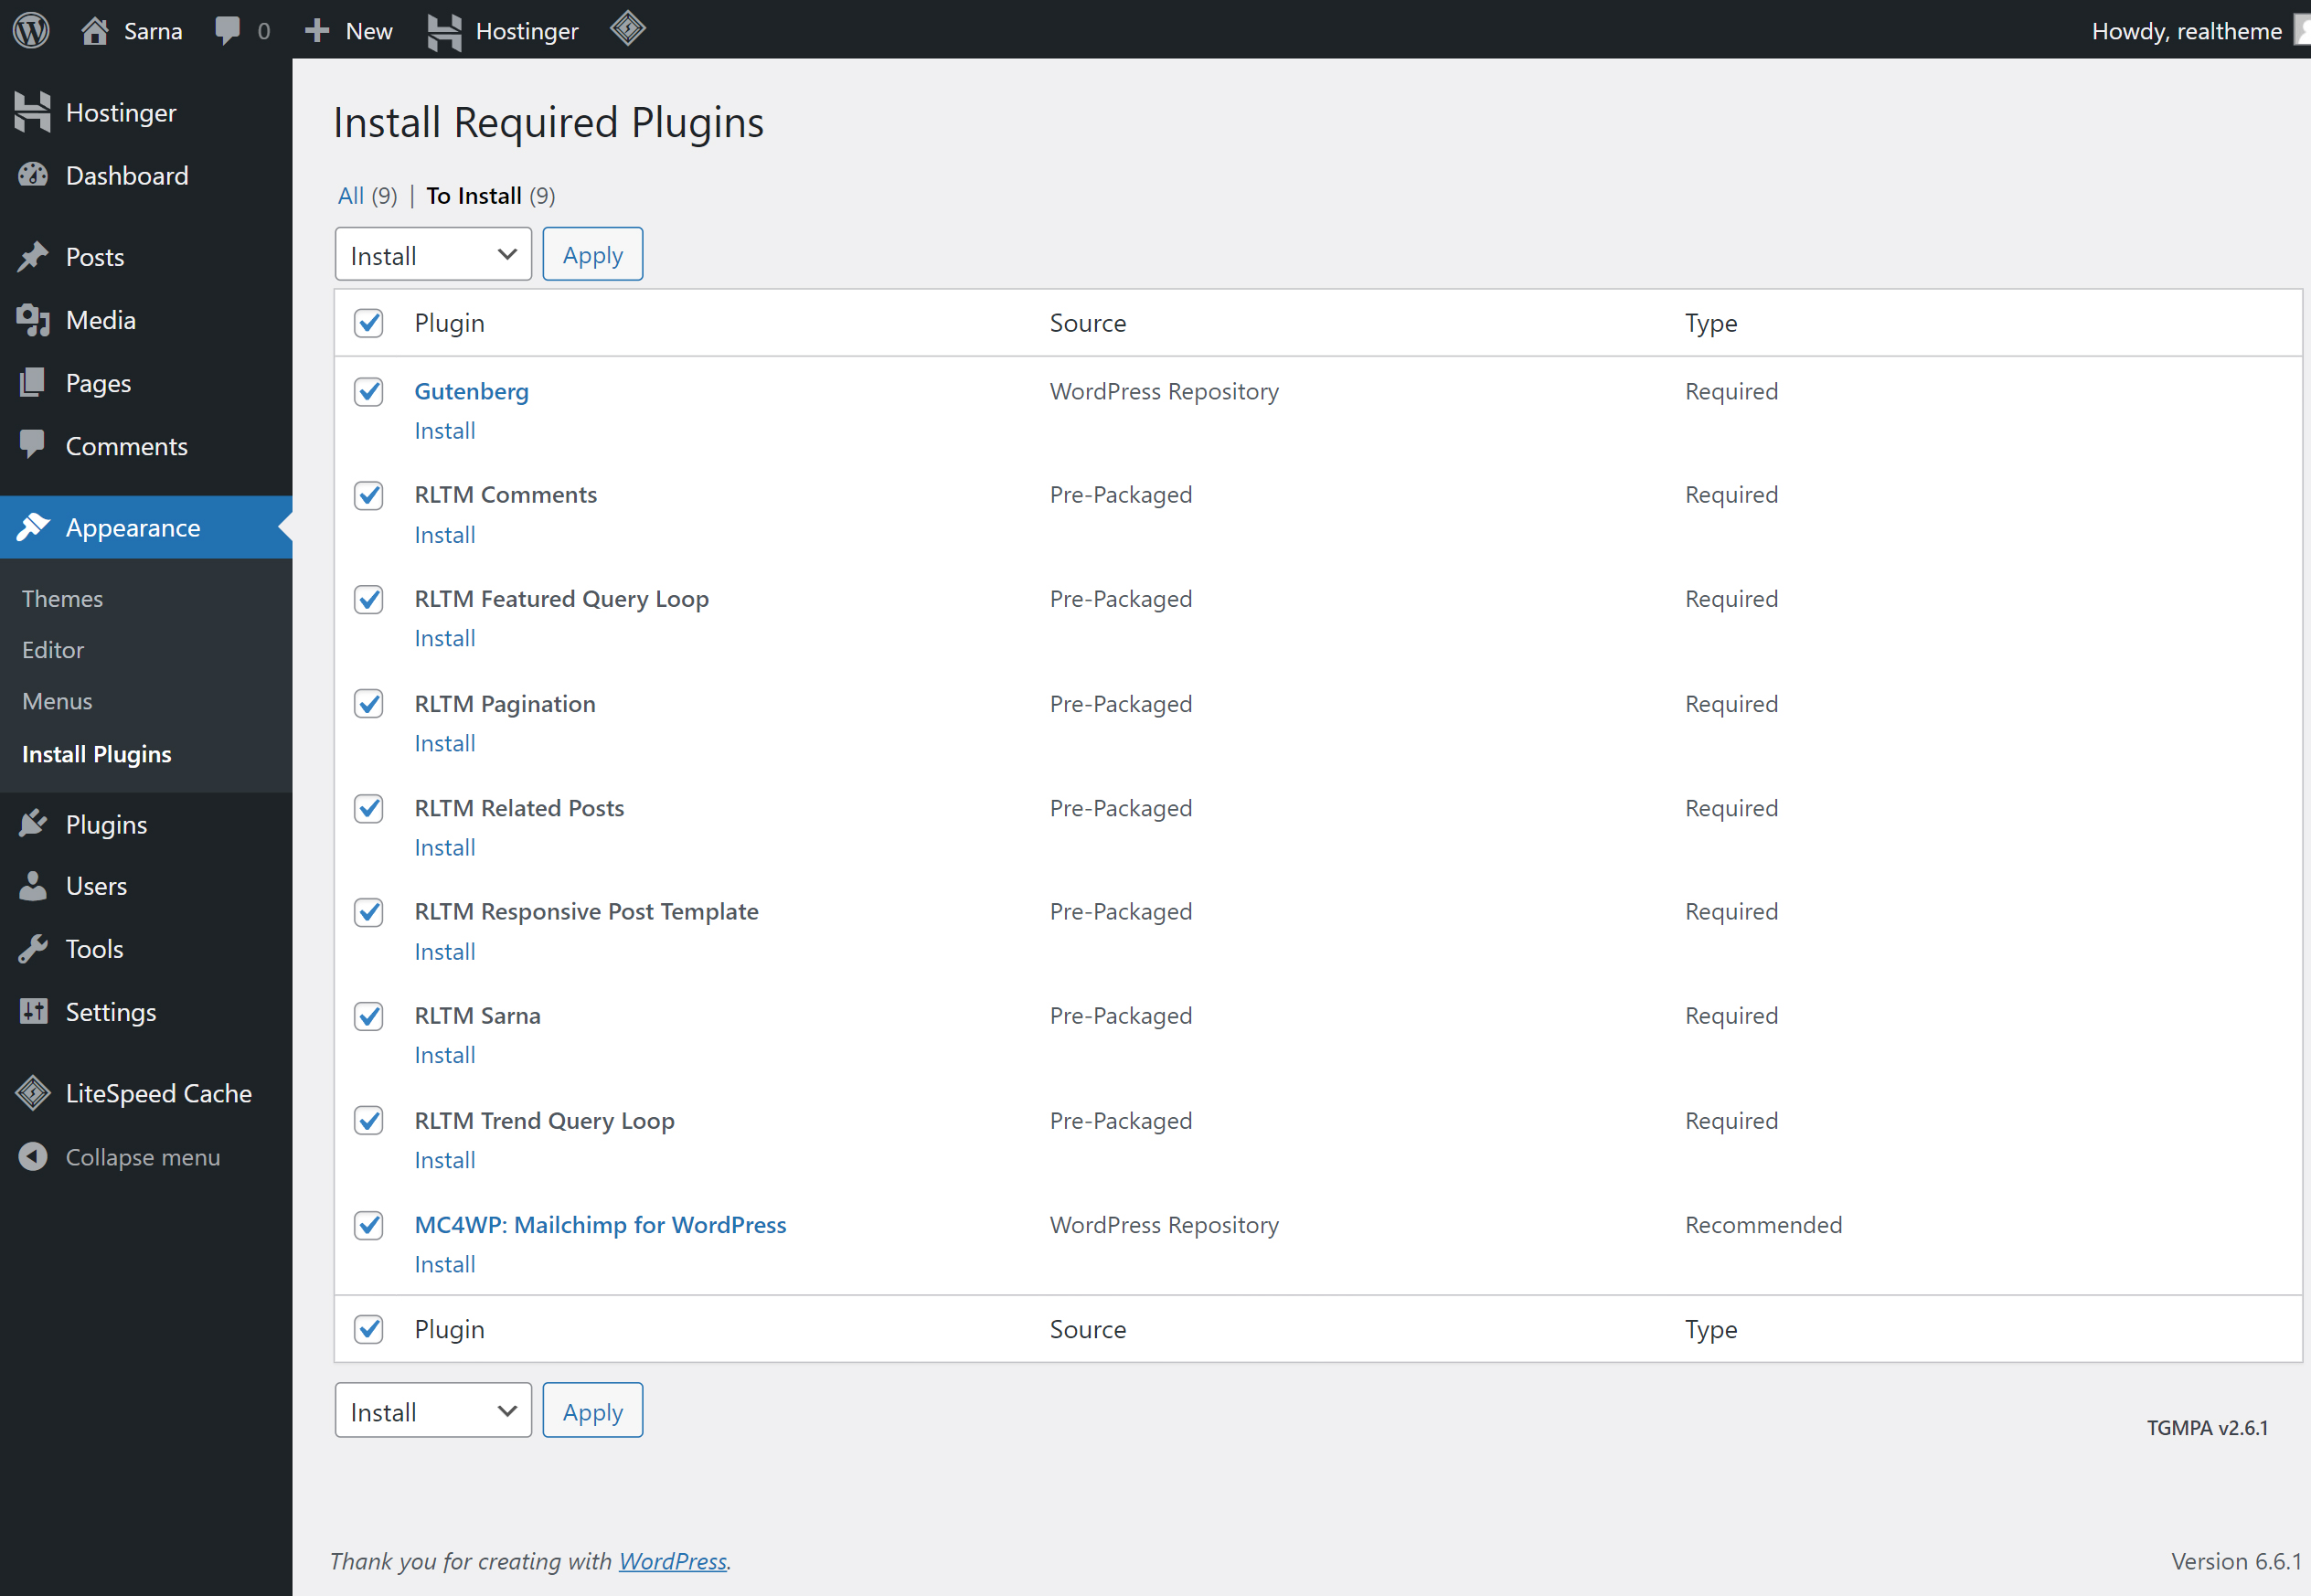
Select all the plugins, choose the "Install" option from the bulk actions dropdown, and click "Apply" (see Pic. 2).
-
After successfully completing the plugin installation, click on "Return to Required Plugins Installer" (see Pic. 3) or click on "Begin activating plugins" link (see Pic. 4).
-
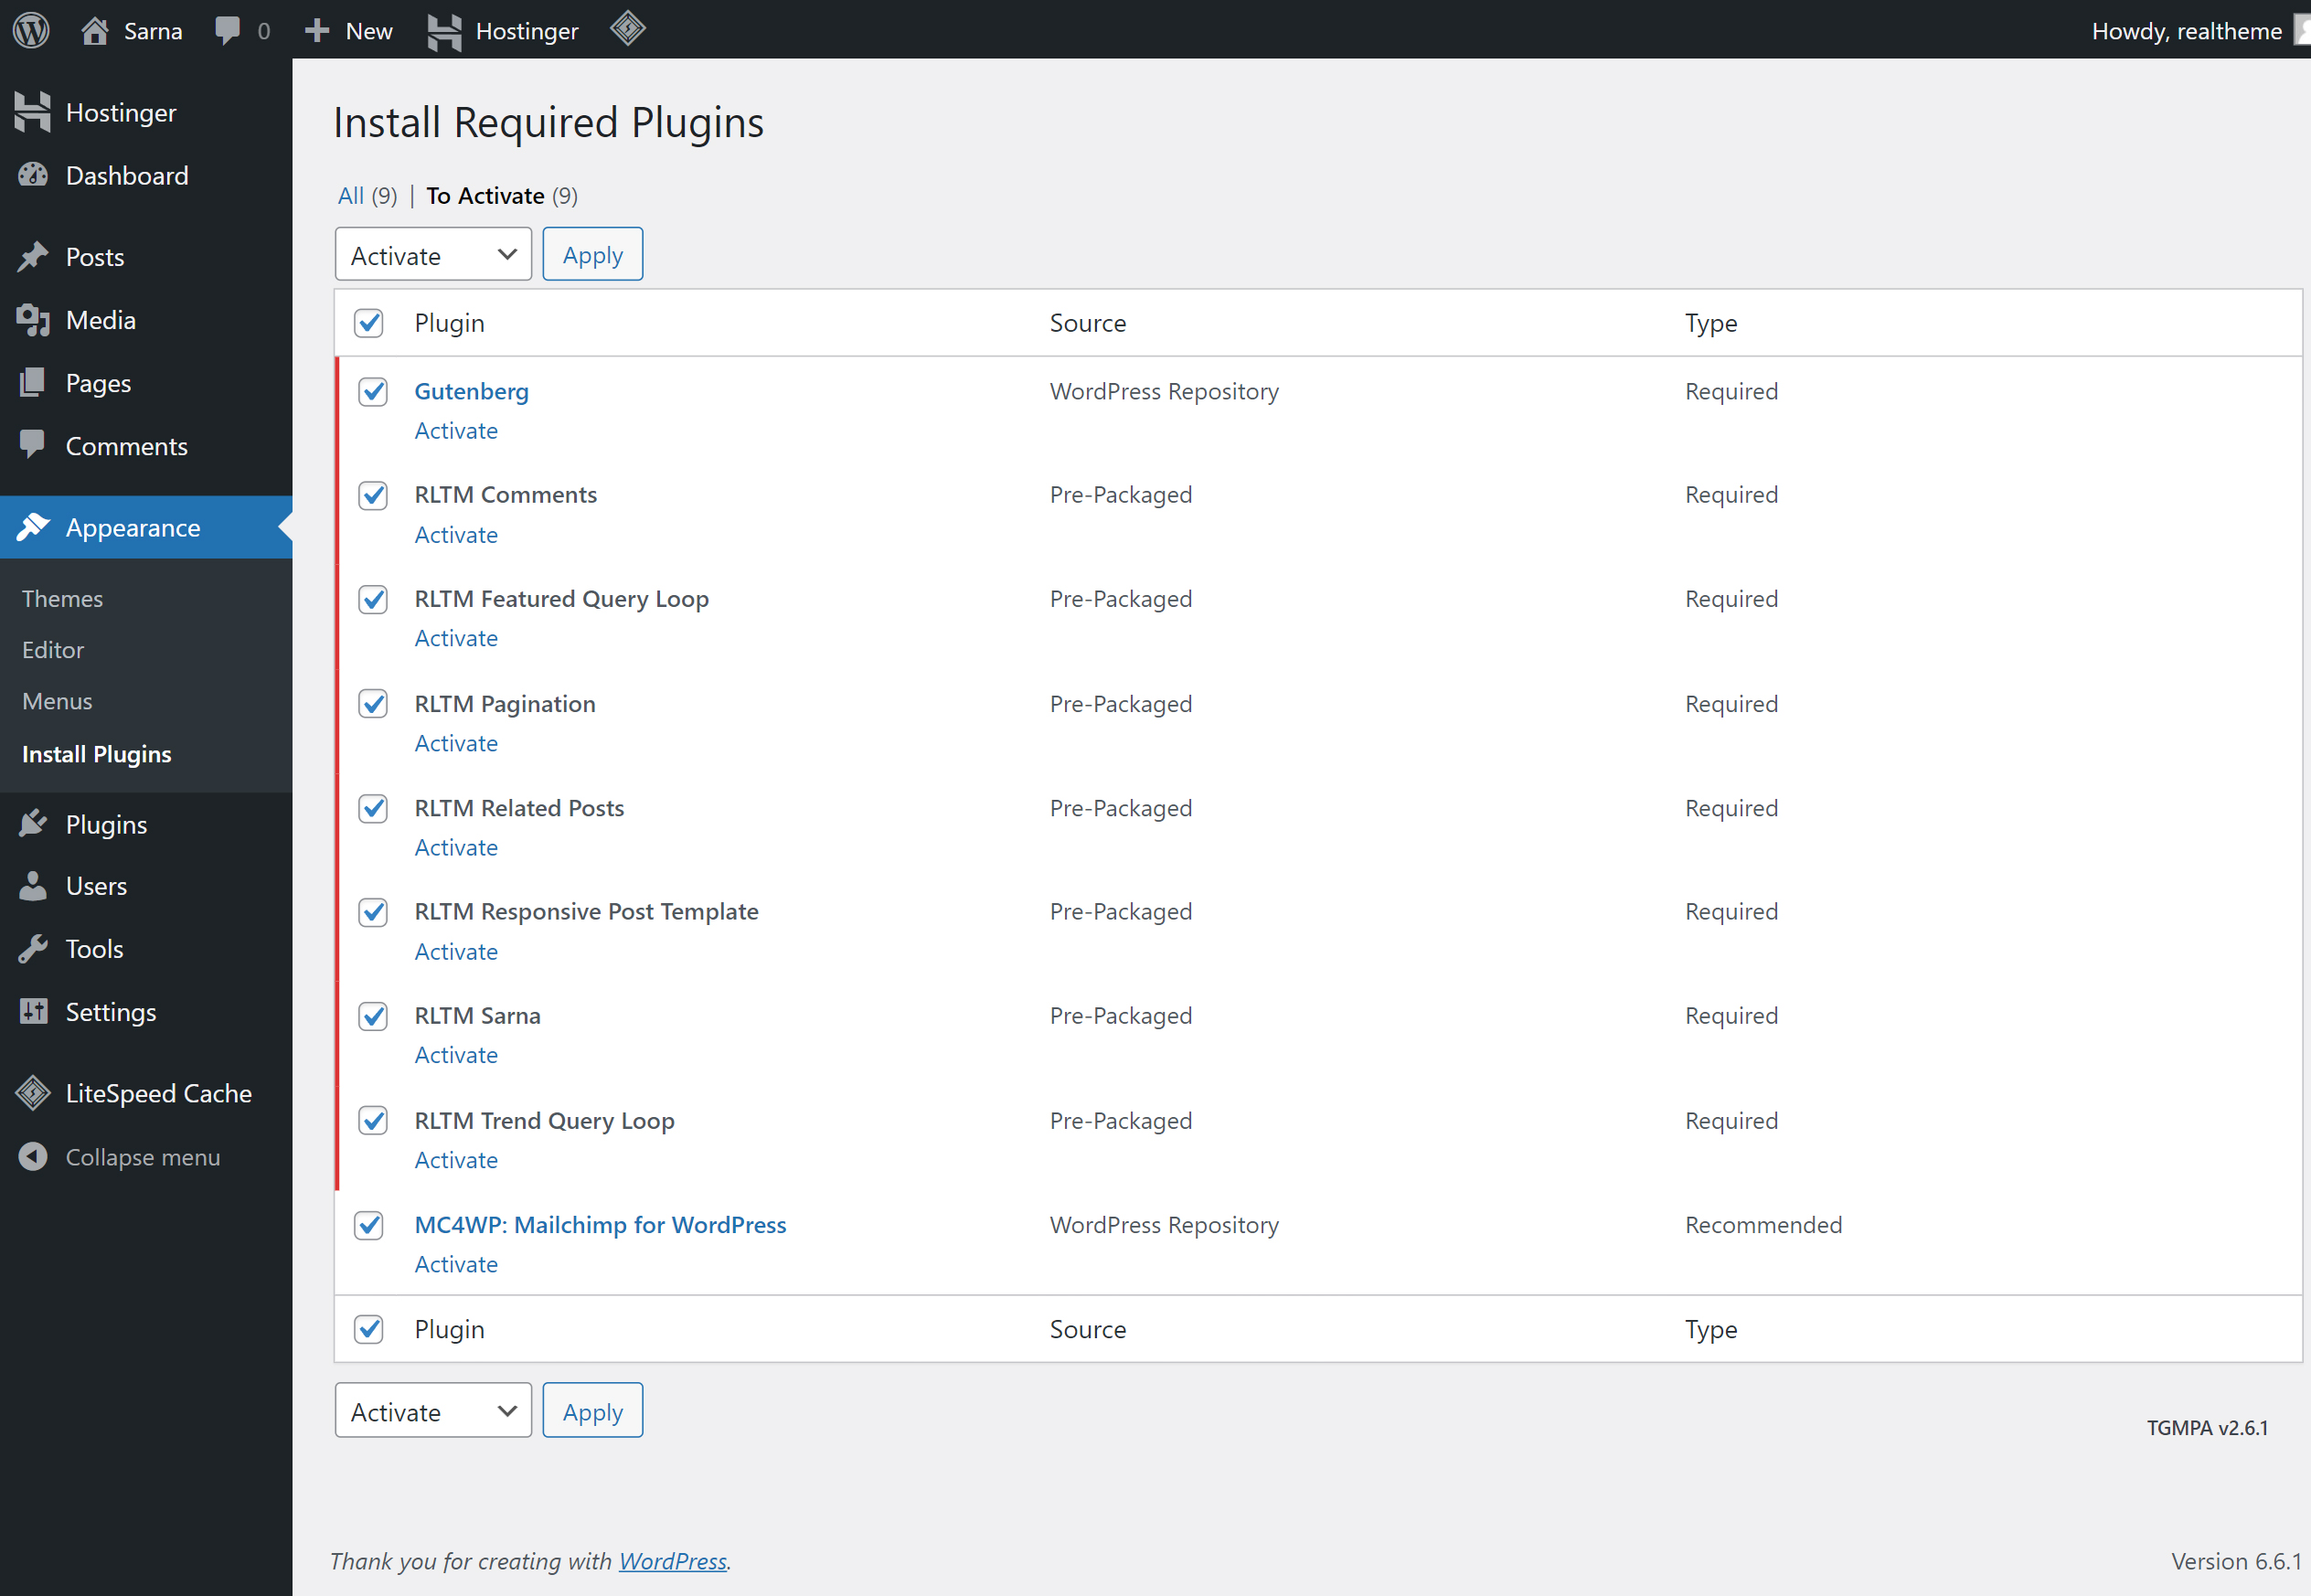
Once again, select all the plugins, choose the "Activate" option from the bulk actions dropdown, and click "Apply" to activate them (see Pic. 5).
-
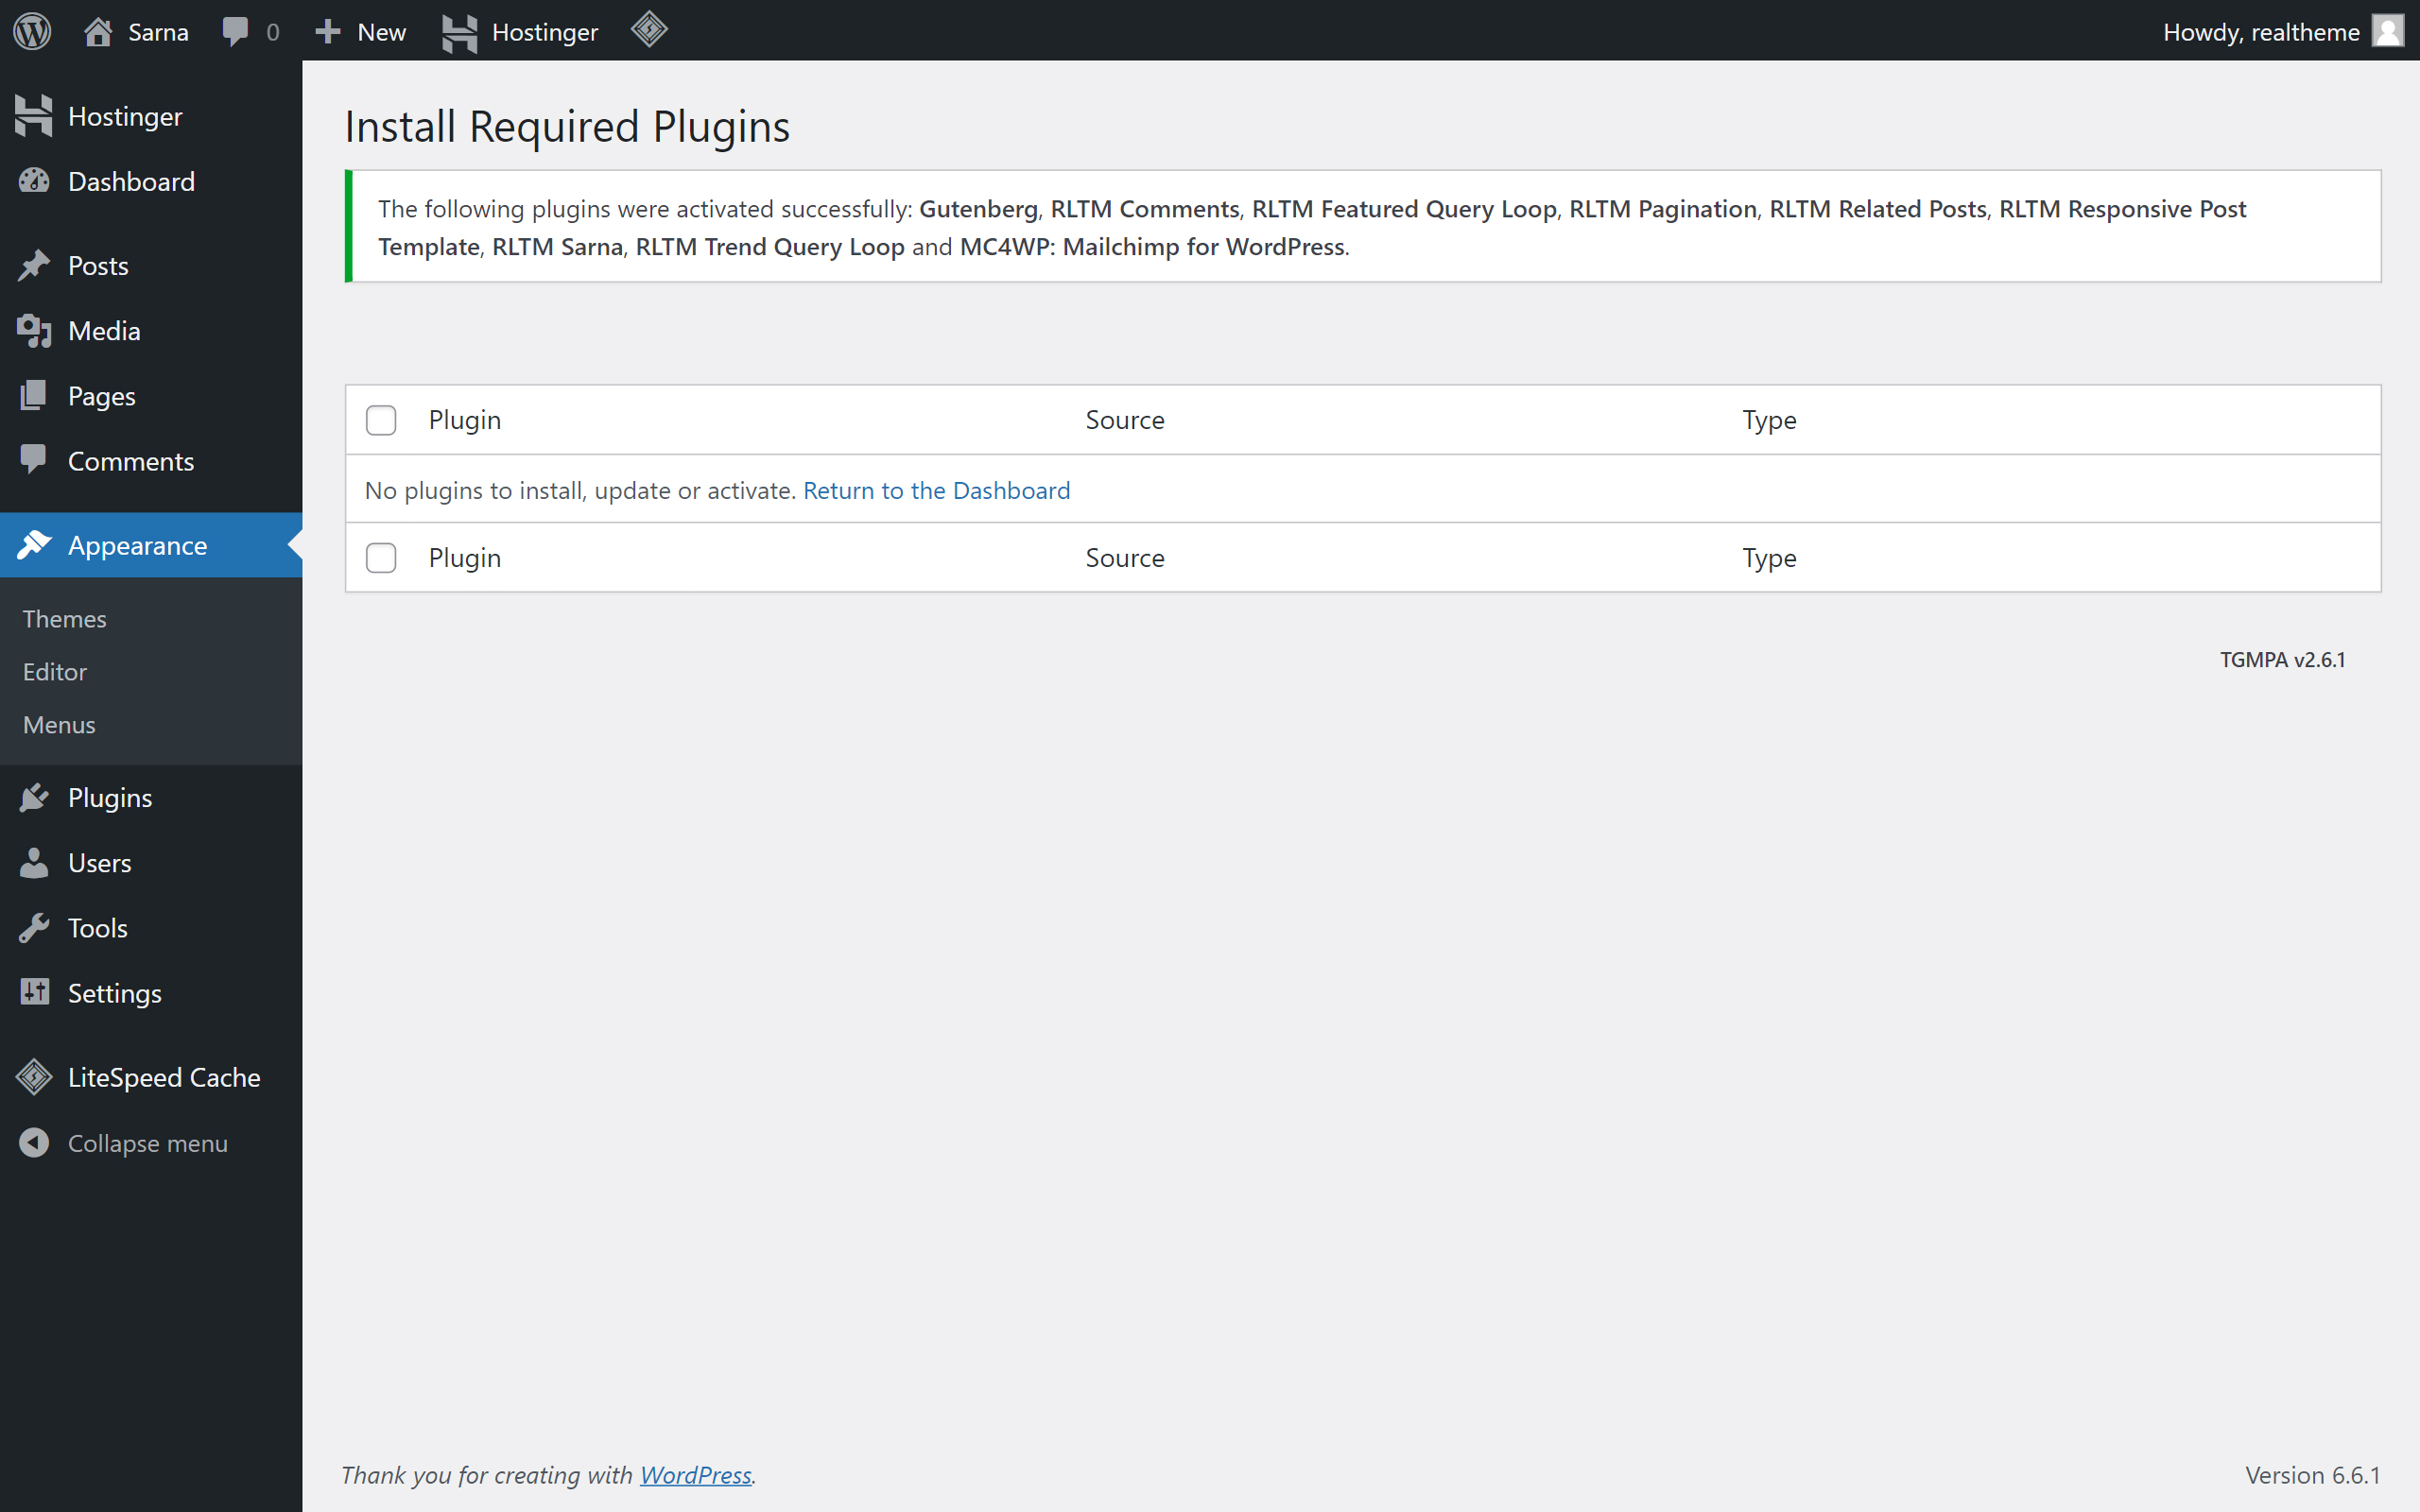
The installer should confirm that the plugins have been successfully activated (see Pic. 6). You can now return to the main page of the Admin Dashboard and begin using your theme.
Import Demo Content
Importing demo content is optional and is not required if you already have a site with existing content. This process is designed to help you quickly set up the theme with sample content.
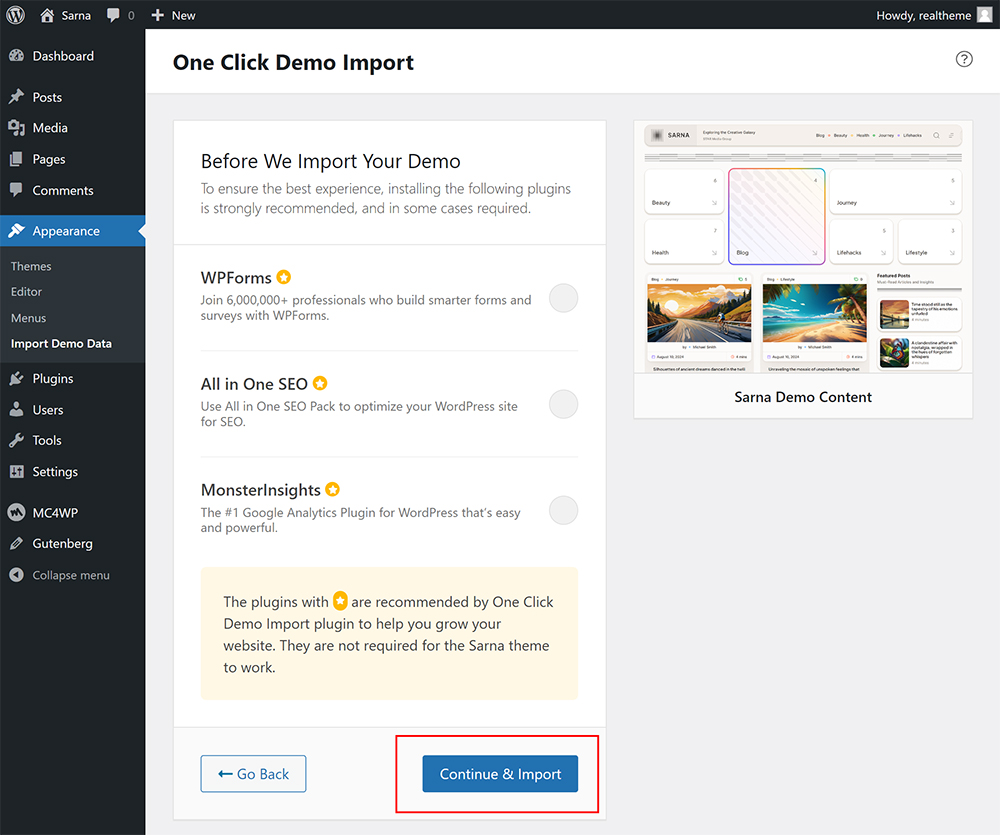
If you choose to import the demo content, you can do so using the One Click Demo Import plugin by OCDI. Follow the plugin’s instructions to complete the import.
Features
All features are presented as custom Gutenberg blocks, with each block offering its own set of configuration options available in the Editor Sidebar. You should explore the theme's block hierarchy independently before beginning to customize the content of your pages in the Editor.
Each block is ready for insertion into the Editor. With Sarna theme you have access to about thirty blocks with which you can design your site pages (templates) as you wish.
Of course, you also have access to standard WordPress blocks and Gutenberg plugin blocks, which are recommended for installation for the proper functioning of the Sarna theme.
You can also try to install third-party plugins that support the Editor and block themes to expand the functionality of your site.
To learn more about blocks and how to use them with the Site Editor, please refer to the official WordPress documentation.
The Sarna theme includes the following block plugins:
- RLTM Author Biography
- RLTM Author Info
- RLTM Badge
- RLTM Button
- RLTM Category Grid
- RLTM Category Info
- RLTM Comments Counter
- RLTM Hero
- RLTM Hero Content
- RLTM Hero Sidebar
- RLTM Navigation
- RLTM Page
- RLTM Page Content
- RLTM Page Footer
- RLTM Post Card
- RLTM Post Card Alternative
- RLTM Post Navigation Links
- RLTM Post Preview
- RLTM Post Slider
- RLTM Post Swiper
- RLTM Post Terms
- RLTM Post Tile
- RLTM Responsive Column
- RLTM Responsive Columns
- RLTM Section
- RLTM Section Content
- RLTM Section Sidebar
- RLTM Separator
- RLTM Share Links
- RLTM Tag Info
- RLTM Views Counter
- RLTM Widget
- RLTM Widget Page
- RLTM Widget Single
- RLTM Comments
- RLTM Pagination
- RLTM Responsive Post Template
- RLTM Trend Query Loop
- RLTM Featured Query Loop
- RLTM Most Commented Query Loop
- RLTM Related Posts Query Loop
Building Blocks
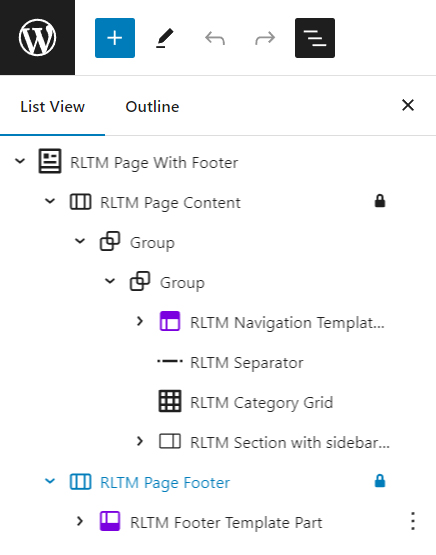
To start building a page template, begin by adding the RLTM Page block. This block's purpose is to pin the footer to the bottom of the page. Within this block, you should use the built-in Gutenberg Group block, which serves as a container for the page content. Inside the Group block, you can add any blocks you need.
If you require a Sidebar on the page, place another block called RLTM Section within the previously mentioned Group block. The RLTM Section block adds a container for the main content and the sidebar. You can configure the sidebar to be positioned on the left or right, as well as adjust other settings such as the gap between containers, sticky sidebar on scroll, and more.
Below is an example of the block structure for the Blog Template. Please pay attention to the hierarchy of nested blocks in the Block Inserter (Pic. 1).
As part of the Building Blocks, you can also utilize the following blocks:
- RLTM Hero – A block designed for unique and responsive column layouts.
- RLTM Responsive Columns – An enhanced version of the built-in Gutenberg 'core/columns' block with extended settings.
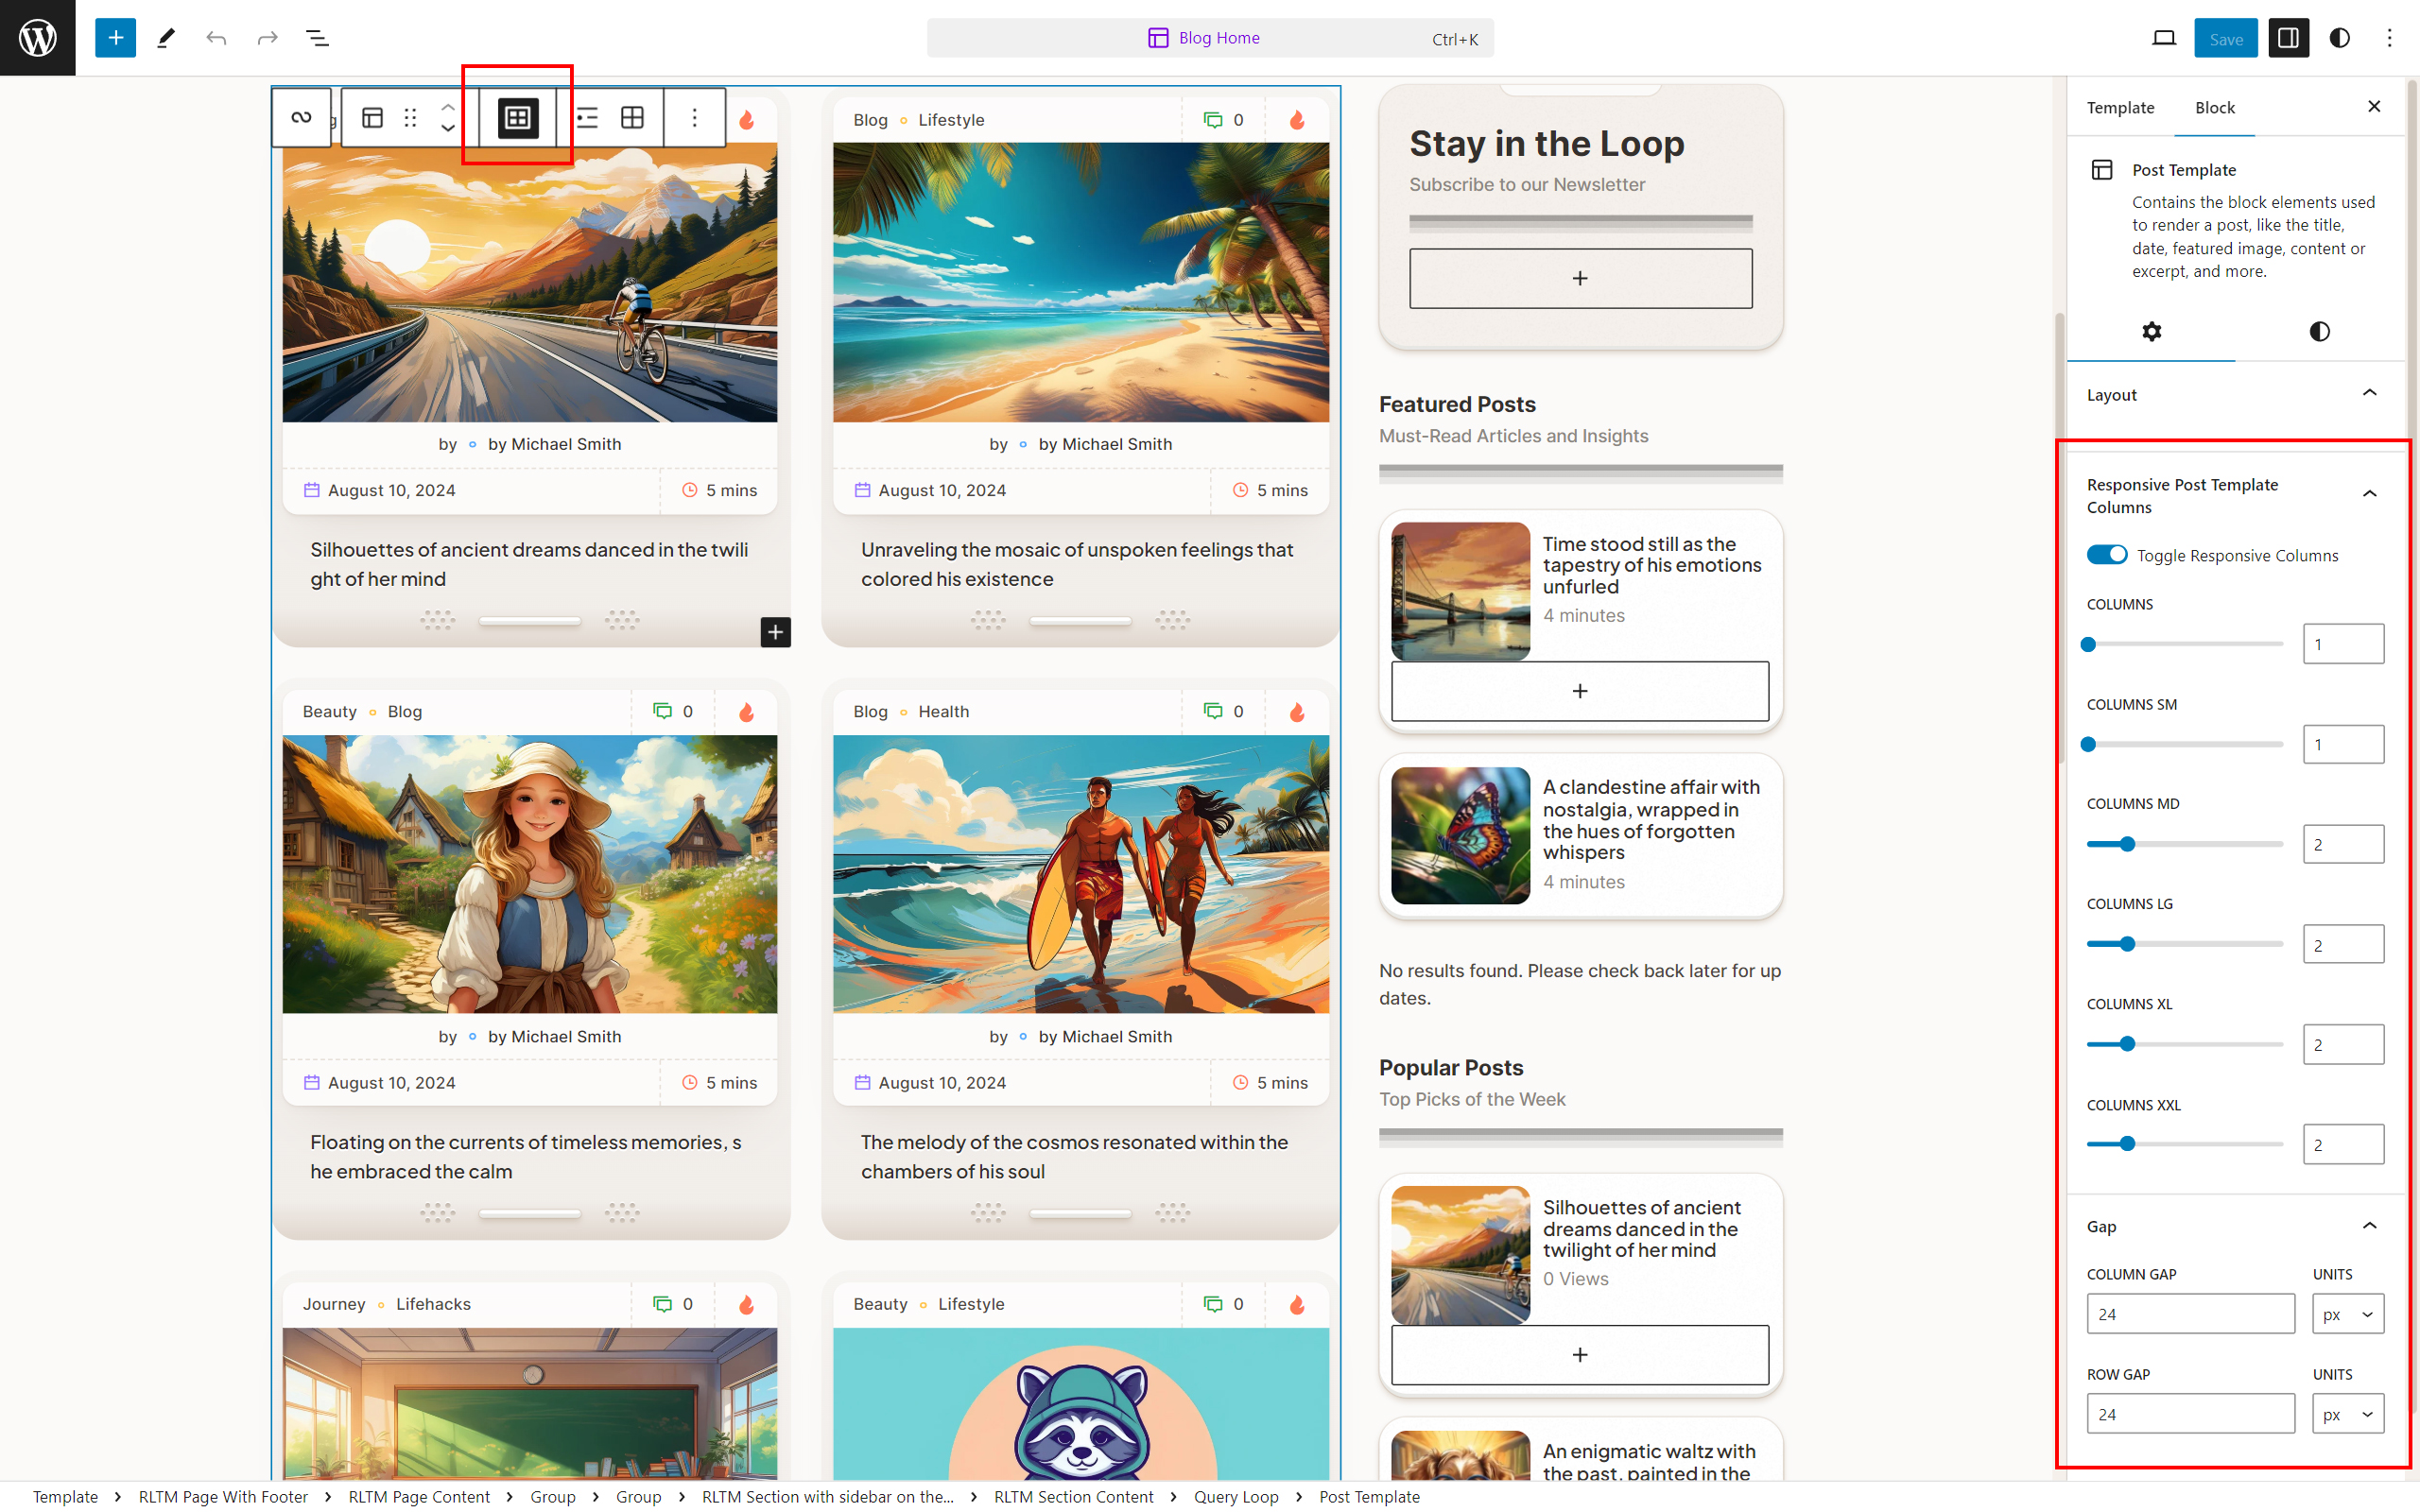
- Post Template – A variation of the built-in Gutenberg 'core/post-template' block, offering a responsive, customizable grid layout for use within the Query Loop block (select the Post Template block and click on the "Responsive Grid View" button in the Block Toolbar. Then, enable the "Toggle Responsive Columns" option in the Editor Sidebar.) (Pic. 2).
Query Loop Variations
In addition to the default Gutenberg Query Loop block, the theme includes the following Query Loop variations:
- RLTM Featured Query
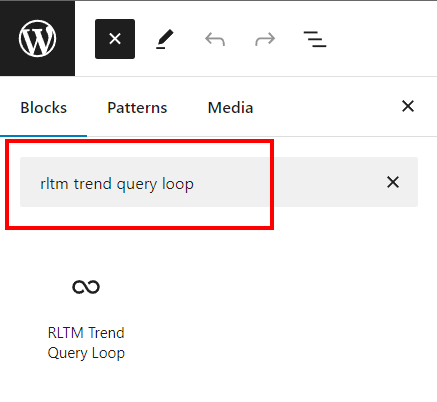
- RLTM Trend Query Loop
- RLTM Most Commented Query Loop
- RLTM Related Posts
Most of these loops have their own settings available in the Editor Sidebar. Users can select the Post Template block as an inner block for the loop. Within the Post Template block, users can choose blocks that represent post metadata or post cards, such as RLTM Post Card, RLTM Post Card Alternative, and RLTM Post Tile.
RLTM Category Grid
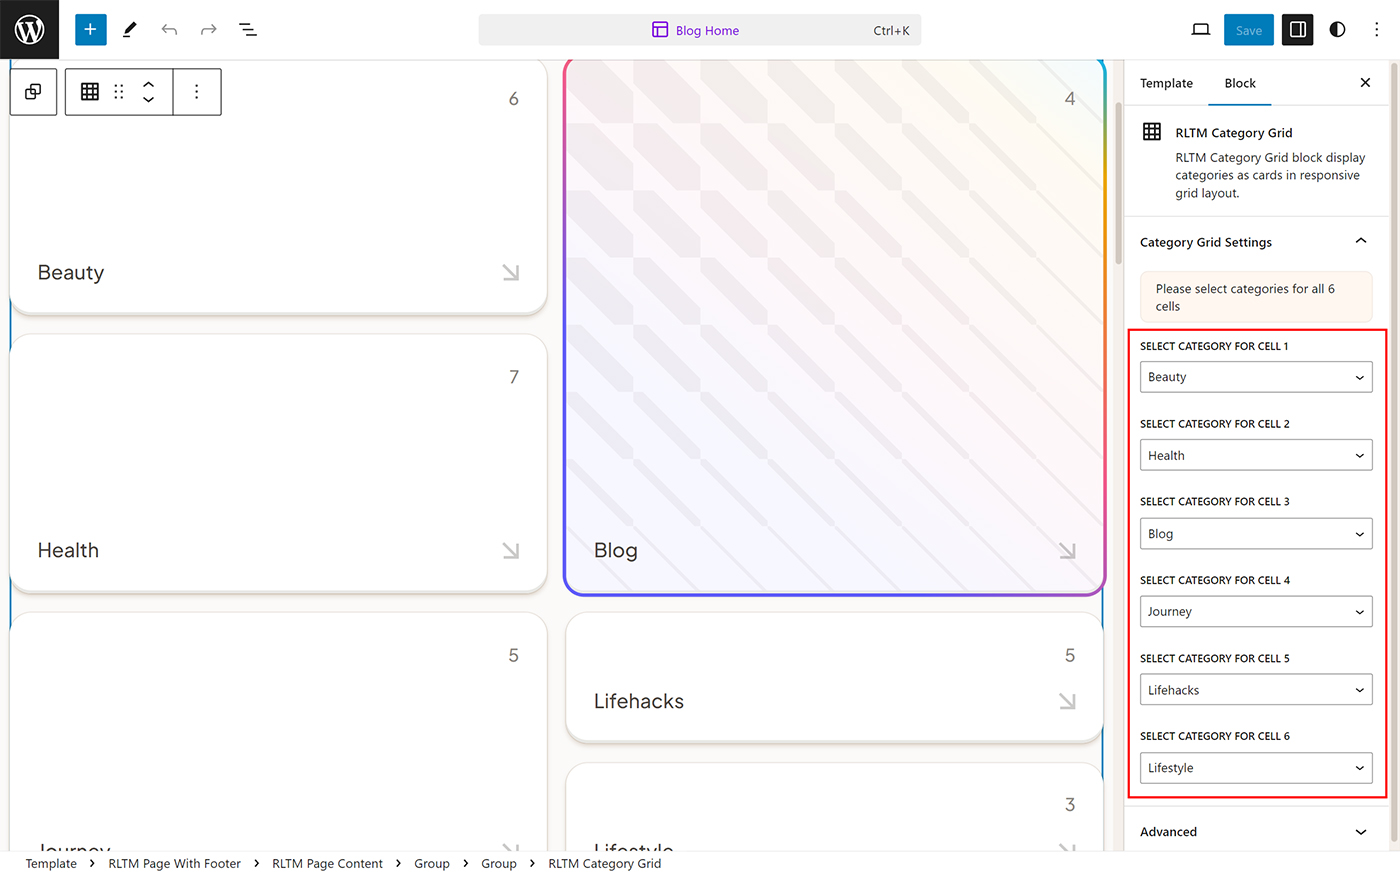
To use the RLTM Category Grid block, your site must have at least 6 categories. You can add categories by navigating to WordPress Admin > Posts > Categories.
In the block settings available in the Editor Sidebar, assign the desired categories to each of the six cells according to your preference (Pic. 1).
RLTM Author Biography
The RLTM Author Biography block can be inserted into templates like Single Posts. It will display a widget with useful information about the post author, such as the author’s name and avatar, author description, and author social profile links.
Depending on the block settings (see Pic. 1), you can get the following results (see Pic. 2).
Additional Options:
The "Written by" label can be changed by editing the text field in the Editor.
To display links to social network profiles, each author needs to save links to their social network profiles in the WordPress Admin Panel > Users > Profile. Specify the required number of profile links and click the Update Profile button at the bottom of the page. (see Pic. 3)
RLTM Badge
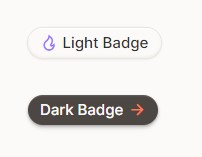
The RLTM Badge block adds a badge element (with or without an icon).
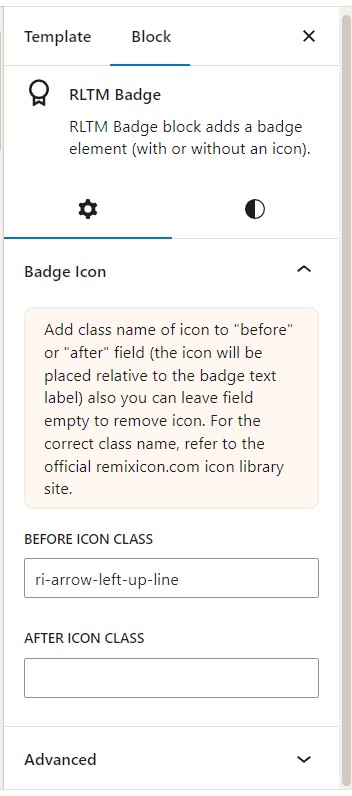
To add an icon before or after the label, you should visit the official Remixicon icon library site and copy the class name of an icon you have chosen, for example 'ri-arrow-left-up-line' (see Pic. 1).
Paste the copied class name into the "Before Icon Class" or "After Icon Class" text fields in the block settings (see Pic. 2).
To edit the label text, click on the block and start typing to change the text (see Pic. 3).
RLTM Button
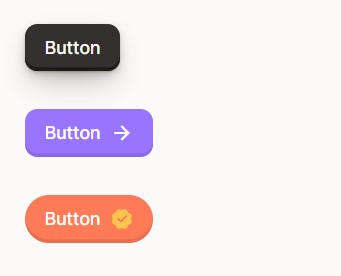
The RLTM Button block adds a button element (with or without an icon).
To add an icon before or after the button label, you should visit the official Remixicon icon library site and copy the class name of an icon you have chosen, for example 'ri-arrow-left-up-line' (see Pic. 1).
Paste the copied class name into the "Before Icon Class" or "After Icon Class" text fields in the block settings (see Pic. 2).
To edit the label text, click on the button block and start typing to change the text (see Pic. 3).
Change other settings like color, click animation, corner rounding as per your preference (see Pic. 2).
Subscription Form
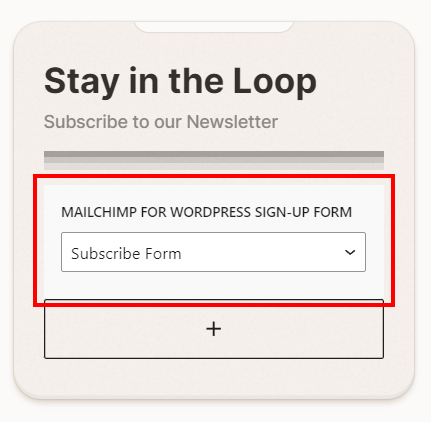
The subscription form is provided by the MC4WP: Mailchimp for WordPress plugin. If you have installed this optional plugin, you will find a corresponding block available in the Block Inserter for adding to your page (Pic-1) (Pic. 2). Please configure the plugin according to the instructions provided by the plugin author (Pic. 3). Additionally, you can use the following HTML code for the subscription form:
<div class="rltm-mc4wp-field-group-column">
<label for="rltm-mc4wp-input-email" class="rltm-mc4wp-label">Email address:</label>
<input id="rltm-mc4wp-input-email" class="rltm-mc4wp-input rltm-mc4wp-input-email" type="email" name="EMAIL" placeholder="Your email address" required />
</div>
<div class="rltm-mc4wp-field-group-row">
<input id="rltm-mc4wp-input-checkbox" class="rltm-mc4wp-input-checkbox" type="checkbox" name="AGREE_TO_TERMS" value="1" required="">
<label for="rltm-mc4wp-input-checkbox" class="rltm-mc4wp-label">I have read and agree to the <a href="http://sarna.local/terms/" target="_blank">terms & conditions</a></label>
</div>
<div class="rltm-mc4wp-field-group-column">
<input class="rltm-mc4wp-submit-btn" type="submit" value="Subscribe" />
</div>
Useful tips
SVG Uploads
It is not allowed themes to enable SVG uploads as it raises security concerns due to the possibility of attackers executing malicious code through SVG's XML. For this reason, this feature is not enabled by default in my theme. However, you can use third-party plugins such as Safe SVG (https://wordpress.org/plugins/safe-svg/) to enable this feature.
After installing and activating these plugins, you will be able to upload and use vector SVG graphics as a site logo, for example, or in other scenarios.
Background Color
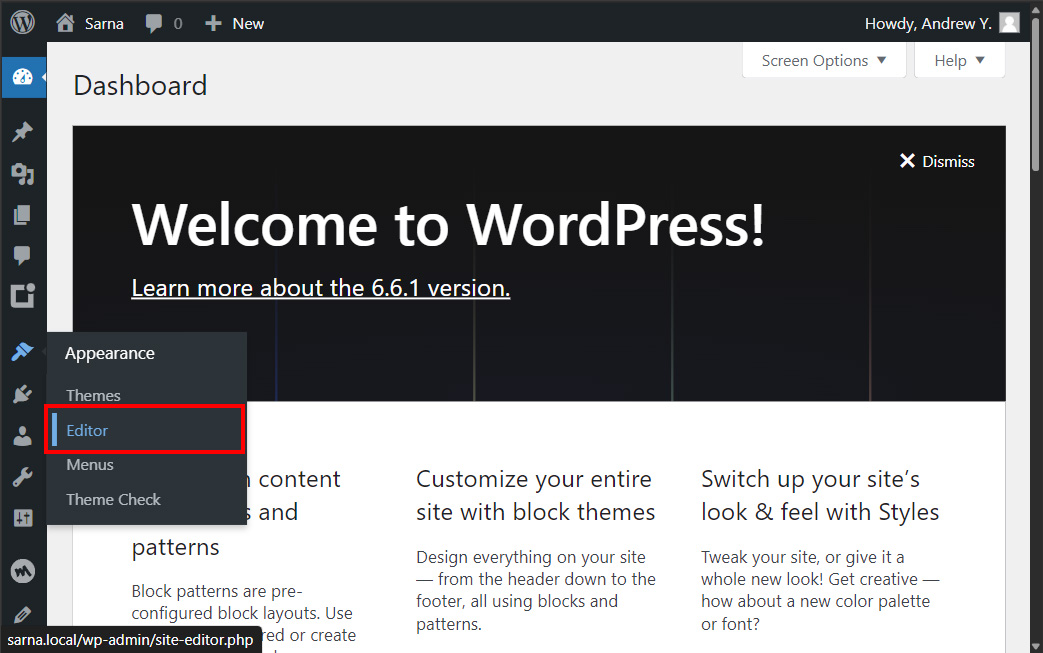
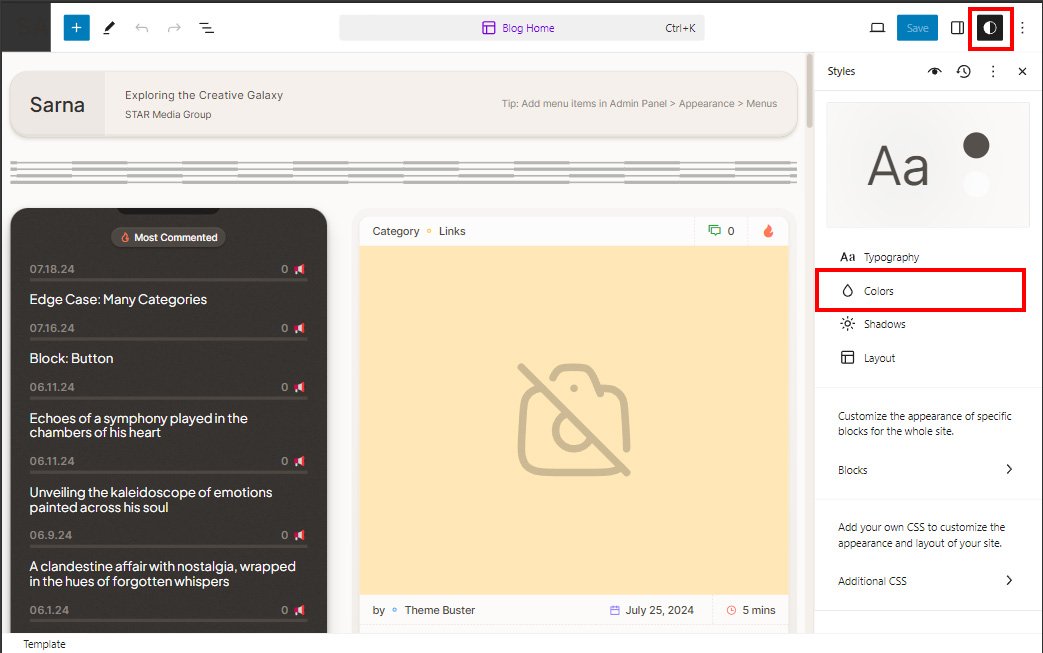
You can use built-in features like changing the background color by adjusting the following settings in the Sidebar from the Site Editor. Here is a step-by-step instruction:
- From the WordPress Admin Dashboard, select the "Appearance > Editor" menu item. (Pic. 1.)
- Enter editing mode by clicking on the page preview. (Pic. 2.)
- Select the "Styles" tab and then "Colors" from the Editor Sidebar. (Pic. 3.)
- Choose the desired color from the color palette, or select your own color for the "Background". (Pic. 4.)
Regenerate Thumbnails
The Sarna theme includes custom thumbnail sizes (post images), so you may need to regenerate thumbnails to ensure proper display of post images. I recommend using WP-CLI (requires command-line access to your server) for this task. For details, refer to the documentation for its media regenerate command.
wp media regenerate
Changelog
v1.0.0 (Aug 1 2024)
- Initial release

